Table of Contents
Make your own lightweight backpacking meals at home and save money while eating better on the trail.
Jordan Myers
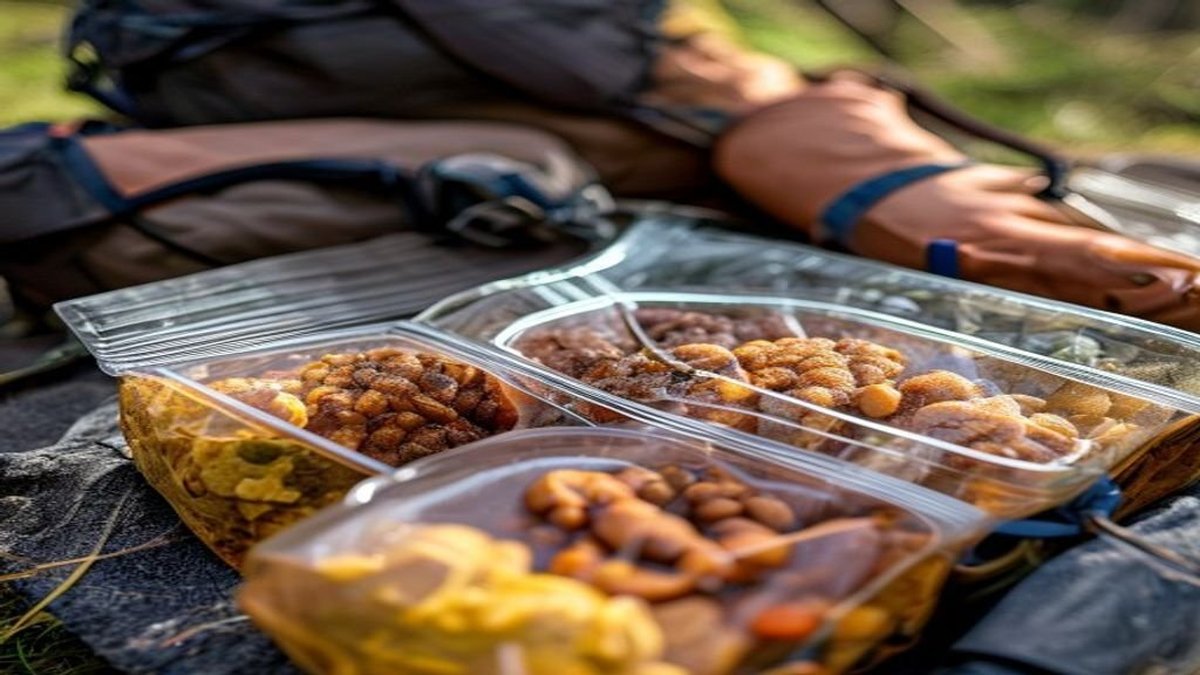
Make your own lightweight backpacking meals at home and save money while eating better on the trail.
You've ripped open those shiny commercial pouches and hoped for the best. Often the result is a watery, salt-laden slurry that barely resembles food. Making your own dehydrated backpacking meals changes all that. You control the ingredients, the sodium, and the flavor profile that actually makes you excited for dinner after 20 miles.
A single store-bought freeze-dried meal can cost $10–14 per serving and packs upwards of 1,200 mg of sodium. When you dehydrate at home, you slash the cost to $3–5 per meal and eliminate the mystery filler. Home-dried vegetables and meats rehydrate faster than freeze-dried alternatives and keep a toothsome texture that reminds you this is real food.
The weight savings aren't just a bonus—they're a game plan. Commercially prepared meals average 100–110 calories per ounce. A well-designed DIY meal consistently hits 120–140 calories per ounce, meaning you carry less weight for the same energy. Over a week-long trip, that difference can surpass a pound.
“Once you learn to dry your own chili or pasta primavera, you'll wonder why you ever settled for cardboard-like pouches. The flavor punch is undeniable, and your body will thank you for reducing that sodium bomb.” — Kari Gunderson, long-distance thru-hiker and author of Trail Cuisine Simplified
You don't need a $2,000 freeze dryer to create trail-worthy meals. A basic stackable food dehydrator with adjustable temperature control (95°F–165°F) handles almost everything from herbs to ground beef. Look for a model with a rear-mounted fan for even airflow. A Nesco Snackmaster Pro or Excalibur 4-tray unit costs between $60 and $150 and will last for years.
If you're in a pinch, an oven set to its lowest temperature with the door cracked can work, but it's less energy-efficient and harder to regulate. The average home dehydrator uses 300–600 watts—roughly $0.05 to $0.12 per hour of electricity. A 12-hour batch costs you less than $1.50, a fraction of what you'd spend on a single freeze-dried pouch.
Pair your dehydrator with a mandoline slicer for uniform 1/8-inch cuts, a vacuum sealer with pint-sized bags, and a Sharpie for labeling. Airtight storage also requires oxygen absorbers to extend shelf life to 6–12 months. Here's what your startup kit should cover:
Dehydration concentrates flavor, so start with quality ingredients. Blanch vegetables like carrots, broccoli, and green beans for 2–3 minutes before drying to preserve color and ensure even rehydration. For proteins, stick with extra-lean ground beef or turkey (93/7 or leaner) because fat doesn't dry; it goes rancid. Cook and rinse ground meat under hot water after browning to remove as much fat as possible.
Season before you dry. A marinade of soy sauce, garlic, and ginger soaked into chicken strips infuses flavor that intensifies during dehydration. Sprinkle chili powder, cumin, and a touch of smoked paprika onto black beans before they hit the tray. Thin, uniform slices dry in 6–8 hours at 135°F and rehydrate in under 10 minutes with boiling water. Uneven chunks lead to crunchy bits that sap your appetite.
Drying cooked grains like quinoa or rice separately works better than trying to dehydrate a fully assembled wet meal. Spread them on mesh-lined trays in a thin layer and break apart any clumps. They'll dry to a shelf-stable crisp in 4–5 hours and plump right back up on the trail.
“Don't think of dehydration as just removing water—it's a flavor concentration technique. A sprinkle of smoked paprika or a dash of soy sauce before drying can transform a bland base into a meal you'll crave on mile 20.” — Jake Wheeler, outdoor educator and founder of Backcountry Eats
These three recipes cover breakfast, a noodle bowl, and a hearty stew. Each batch yields multiple servings and stores flat in your pack. Weight and nutrition stats are based on measured averages from my own kitchen.
Hearty Lentil & Sausage Stew (8 servings, 4.2 oz each)
This one-pot base delivers 18 g of protein and only 390 mg of sodium per serving. Start by sautéing diced onions, garlic, and a pinch of red pepper flakes. Brown 1 lb of lean Italian turkey sausage (casings removed) and drain well. Combine with 2 cups of cooked brown lentils, 1 can of drained fire-roasted tomatoes, and 1 cup of frozen spinach. Spread the mixture on dehydrator trays lined with silicone sheets and dry at 135°F for 8–10 hours, flipping halfway. Once bone-dry, portion into bags with a tablespoon of powdered tomato soup mix for a richer broth. On the trail, add 1 cup boiling water and let it sit 12 minutes.
Thai Peanut Noodles with Chicken (6 servings, 3.9 oz each)
Cook 8 oz of thin rice noodles until just al dente, rinse, and dry on mesh trays for 3 hours until rigid. Poach 1 lb chicken breast, shred, and dehydrate at 145°F for 4–5 hours. For the sauce, combine 1/2 cup powdered peanut butter, 3 tbsp coconut milk powder, 1 tsp garlic powder, 1 tsp ginger, 1 tbsp brown sugar, and a pinch of cayenne. Pack noodles, chicken shreds, and sauce powder together. A serving packs 22 g of protein and rehydrates in 8 minutes with 1 cup hot water. The coconut milk powder keeps the fat minimal while delivering a creamy mouthfeel that doesn't taste like diet food.
Loaded Breakfast Scramble (4 servings, 3.5 oz each)
Scramble 8 eggs, cook fully, and dry on fruit-leather sheets at 145°F for 6 hours. Separately dehydrate diced bell peppers, onions, and pre-cooked turkey sausage crumbles. Grind the dried eggs to a coarse powder in a food processor. Combine all ingredients with a pinch of salt, pepper, and dried chives. A serving needs just 1/3 cup cold water—stir, wait 5 minutes, and eat straight from the bag. With 19 g of protein and 420 calories per meal, it's a clean start before breaking camp.
Vacuum sealing isn't just for shelf life; it shrinks meals to a fraction of their bulk. A 5-day meal block can slide into the side pocket of a 50L pack. Add a 100cc oxygen absorber to each bag and squeeze out every breath of air before sealing. Label the front with the meal name, dehydration date, and water requirement (e. g., “+1 cup boiling, 10 min.”).
On the trail, a long-handled spoon and an insulating pot cozy turn rehydration into a hands-off process. A cozy can cut simmer time by 50% and save roughly 0.5 oz of fuel per meal—over a 5-day trip, that's a half-pound of fuel you don't have to carry. Most dried meals need a 2:1 water-to-meal ratio by volume. Scratch a mark inside your pot at the 1-cup line so you don't waste fuel guessing.
“Always test your meal at home before taking it on a multi-day trek. Nothing kills morale faster than a bag of crunchy lentils because you underestimated rehydration time.” — Kari Gunderson
Cold-soak options work if you're going stove-free. The breakfast scramble and Thai noodles absorb cold water in 20–30 minutes. Pre-portion meals into zip-top mylar bags with a gusseted bottom so they stand on their own while you wait.
Calorie density is the holy grail of backpacking nutrition. By blending high-calorie ingredients like dehydrated coconut milk, nuts, and seeds into your meals, you can push the calorie-per-ounce number higher without adding water weight. A typical homemade meal averages 120–140 calories per ounce, while many commercial freeze-dried pouches land at 100–110. On a 7-day trip with 1.5 lbs of food per day, that's an extra 3,000 calories for the same pack weight.
Sodium control is the other silent advantage. Commercial meals often dump 1,500 mg of sodium into a single pouch—nearly the entire recommended daily maximum for some hikers. Diy meals average 400–700 mg per serving. Less bloating, less water retention, and fewer cramps on the ascent. You can always pack a tiny salt shaker to adjust to taste if you're losing electrolytes on a hot day.
Watch the macros. Aim for a balance of 40–50% carbs, 25–35% fat, and 15–20% protein. Dehydrated meals naturally skew toward carbs, so add a tablespoon of olive oil or crushed walnuts after rehydration to boost healthy fats and satiety. Weigh every component on a digital scale before bagging—consistency equals reliable fuel for your legs and your brain.
Developing a consistent navigation routine keeps you oriented throughout the day. Every time you stop for a water break or snack, pull out your map and identify your current location. Note the next landmark you expect to see and the approximate time to reach it. This habit of regular map checks prevents the gradual disorientation that leads to getting lost. Experienced hikers recommend taking a bearing every 30 to 45 minutes in unfamiliar terrain, even when the trail seems obvious.
Before any hike, study the route on a map and identify key waypoints, bailout points, and potential hazards. Note the direction of ridges, valleys, and water features so you can use them as natural handrails. Share your planned route with someone who will notice if you do not return on time. Proper pre-trip planning transforms a potentially stressful navigation challenge into an enjoyable day on the trail.