Table of Contents
Field techniques for wildlife photography including positioning strategies, camera settings for action shots, and mastering patience in nature.
Jordan Myers
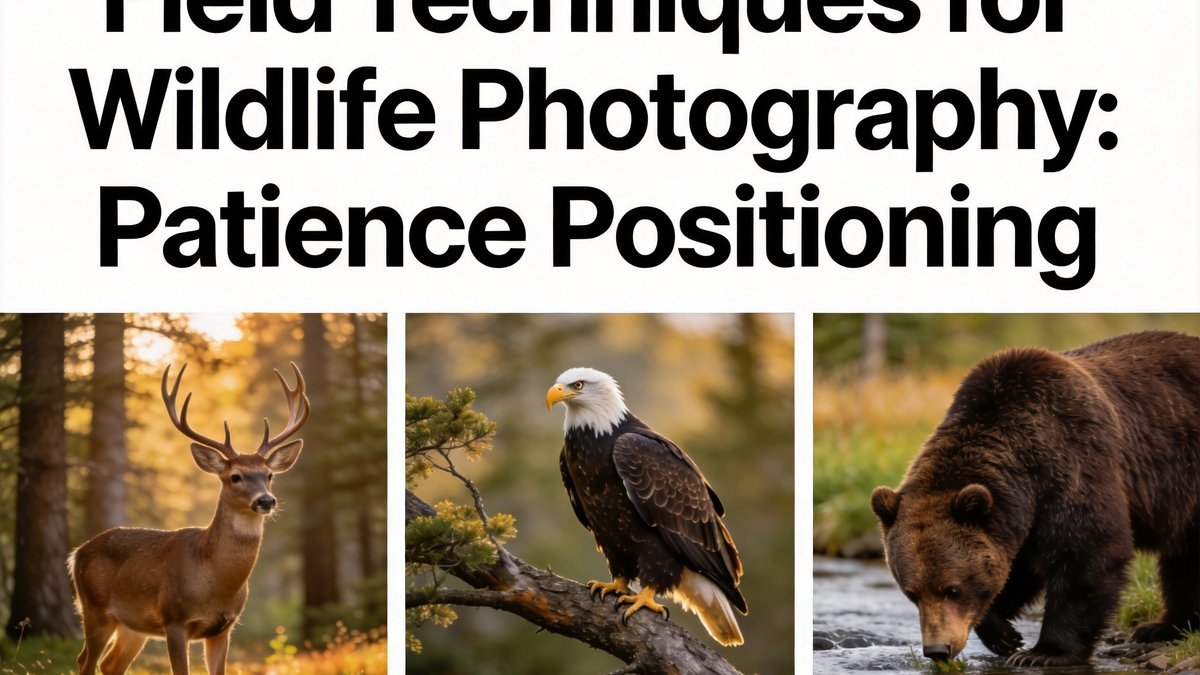
Field techniques for wildlife photography including positioning strategies, camera settings for action shots, and mastering patience in nature.
Field techniques for wildlife photography including positioning strategies, camera settings for action shots, and mastering patience in nature.
Patience is the single most important skill in wildlife photography. Professional wildlife photographers spend hours, days, or even weeks waiting for the perfect moment. Animals operate on their own schedules, and you cannot hurry them. The ability to remain still, quiet, and observant for extended periods separates successful wildlife photographers from those who capture only fleeting, distant glimpses.
Successful patience strategies include arriving at locations before sunrise when animals are most active, settling into position quietly, and minimizing movement. Learn to scan slowly and systematically rather than searching frantically. Use your peripheral vision to detect movement, as direct staring can alert animals to your presence. Develop a meditation-like focus that makes time in the field productive rather than tedious.
Wildlife photography is 90% waiting and 10% chaos. The photographers who produce stunning images are not luckier than the rest. They simply out-wait everyone else. Patience is the lens through which opportunity appears.
Your position relative to wildlife determines everything about the images you can capture. The golden rule is to remain downwind of your subject, as most animals rely heavily on scent detection. Approach slowly and indirectly, never walking directly toward an animal. Pause frequently and avoid making eye contact, which animals often interpret as a threat.
Use natural cover including trees, bushes, and terrain features to break up your outline. Move during moments when the animal is distracted by feeding, grooming, or looking away. If an animal shows signs of stress including head-raising, ear-flicking, or tail-flagging, stop your approach immediately. You have pushed too close.
Wildlife photography camera settings prioritize speed over perfection. Shutter speed is the most critical setting for capturing sharp images of moving animals. A minimum of 1/500 second is recommended for stationary animals, 1/1000 second for walking animals, and 1/2000 second or faster for running or flying subjects. Increase ISO to maintain shutter speed rather than risking blur.
Aperture priority mode with auto ISO is a popular choice for wildlife photographers, allowing you to control depth of field while the camera manages exposure. Set aperture to f/5.6 to f/8 for most wildlife subjects. Use continuous autofocus mode with animal eye-tracking if available. Burst mode at 10-20 frames per second captures the decisive moment in action sequences.
Natural light quality dramatically affects wildlife images. The golden hours (first and last hour of daylight) provide warm, directional light that creates dimension and texture in animal subjects. Overcast days produce soft, even lighting that reduces harsh shadows and is ideal for detailed portraits of birds and mammals.
Backlighting can create stunning rim-light effects on animal fur or feathers, particularly in morning or evening light. Side lighting emphasizes texture and form. Front lighting provides the most even exposure but can appear flat. Learn to recognize light conditions and adjust your position relative to the sun for optimal results.
Effective wildlife composition starts with the rule of thirds. Place the animal off-center in the frame, looking into the empty space. Leave room in front of moving animals for them to run or fly into. Eye-level shots create the most intimate connection with the subject, which often means getting low to the ground.
Environmental portraits that show animals in their habitat can be more powerful than tight close-ups. These images tell a story about where and how the animal lives. Leading lines, framing elements like overhanging branches, and reflection in water add visual interest. Pay attention to backgrounds. A cluttered background distracts from the subject, while a clean background makes the animal stand out.
On Wyoming's National Elk Refuge near Jackson Hole, photographers position themselves along the 3.7-mile Flat Creek Trail at dawn, when bull elk emerge from the willows to feed. Setting up a tripod with a Wimberley WH-200 gimbal head allows precise tracking of moving animals without disturbing them. The key is to arrive at least 45 minutes before sunrise, wearing muted earth tones like Kuiu Verde 2.0 pattern clothing that blends with sagebrush. Marking the wind direction with a small puff of cornstarch powder from an old spice shaker helps maintain a downwind position, as elk can detect human scent from over 400 yards away.
For photographing gray wolves in Yellowstone's Lamar Valley, the recommended approach is to park at the pullout near the confluence of the Lamar and Soda Butte Creeks and walk south along the old roadbed for exactly 0.8 miles. Using a Nikon Z9 with a NIKKOR Z 800mm f/6.3 VR S lens, set the shutter speed to 1/2500 second for running wolves, with continuous high-speed burst mode at 20 frames per second. The Sony FE 600mm f/4 GM OSS lens with a 1.4x teleconverter provides an effective 840mm reach, ideal for keeping a safe distance of at least 100 yards from den sites. Photographers should carry a Silva Ranger compass and a Garmin in Reach Mini 2 for navigation, as cell service is nonexistent in the valley's 24-mile stretch.
In the Everglades' Shark Valley, the 15-mile tram road offers prime positions for photographing alligators basking on the banks of the canal. Setting up a tripod with a Really Right Stuff BH-55 ball head at the 2.5-mile marker, where the canal bends south, provides a clear view of gators at 30 to 50 feet. Using a Canon EOS R3 with a RF 100-500mm f/4.5-7.1 L IS USM lens, set the aperture to f/8 for sufficient depth of field, and use evaluative metering with -0.7 exposure compensation to prevent highlight clipping on white bellies. The best light occurs between 7:00 and 9:00 AM during the dry season from December to April, when gators are most active and the sun angle is low enough to illuminate their textured scales without harsh shadows.
For capturing the courtship displays of greater sage-grouse on leks in central Colorado's Gunnison Basin, photographers should arrive at the lek site by 5:00 AM, using a headlamp with a red filter to avoid disturbing the birds. Setting up a camouflage blind like the Ameristep Brickhouse at least 50 yards from the lek's center allows for a 400mm lens to fill the frame with displaying males. Using a Nikon D850 with a AF-S NIKKOR 500mm f/5.6E PF ED VR lens, set the shutter speed to 1/2000 second with a wide-open aperture of f/5.6 to isolate individual birds against the sagebrush backdrop. The peak display season runs from mid-March to late April, with males typically performing their strutting dances between 6:00 and 8:00 AM when temperatures are below 50 degrees Fahrenheit and wind speeds are under 10 miles per hour.
Forpositioninginopenterrain, thesagebrushflatsof Yellowstone's Lamar Valley offer a masterclass in ground level concealment Photographers should crawl into position using a lightweight Sitka Gear Delta Wading Jacketovera KUIUPro Guide Pant to minimize noise and scent dispersion A500mmf/4lensona Gitzo Systematictripodwitha Wimberley WH 200 gimbal head allows for fluid tracking at distances of 50to 200yards. The key is to align the camera with natural contours like a dry creek be dora patch of big sagebrush then wait for the thermals to shift upward after 9a. m., carrying humans cent away from pronghorn orbison herds
Alongthe Hoh River Trailin Olympic National Park, Roosevelt elk require a different positioning strategy using dense understory ferns and fallen nurse logs as blind material Aphotographershouldsetup 30to 40 yards from a known wallow or grazing area wearingmutedearthtoneslike First Lite's Obsidian Merino Hood y to blend with the mossy forest floor The technique involves scanning with a Vortex Razor HD10x 42binocularata 45 degree angle to detect ear flicking or antler rustling then slowly rotating the camera on a Benro Mach 3tripodwithoutliftingthehead. This approach yields sharp images at 1 800 second shutter speed and f 8 aperture capturingelkinthesoft, dappledlightofthe Pacific Northwestcanopy.
In Yellowstone National Park's Lamar Valley, photographers often stake out positions near the Soda Butte Creek confluence at dawn, where bison herds and gray wolves regularly pass within 50 meters. Using a Gitzo tripod with a Wimberley WH-200 gimbal head allows for smooth panning with heavy telephoto lenses like the Nikon 600mm f/4, crucial when tracking a sprinting coyote across sagebrush flats at 1/2000th of a second shutter speed. Positioning on the north-facing slope above the creek provides a low-angle view that avoids backlighting from the rising sun, while the 100-400mm zoom range on a Canon R5 body offers flexibility for subjects moving unpredictably between 20 and 150 meters. This specific spot, accessible via the unpaved Blacktail Plateau Drive, requires a high-clearance vehicle and a 15-minute hike before dawn to avoid disturbing the thermal features that draw elk at first light.
On the Teton Crest Trail in Grand Teton National Park, photographers targeting pronghorn antelope should establish a blind behind sagebrush clumps at the Paintbrush Divide overlook, using a camouflage net from KUIU that blends with the alpine tundra at 10,000 feet elevation. A carabiner clip on the tripod leg holds a small beanbag for stabilizing a 200-500mm f/5.6 lens on uneven talus slopes, while a remote shutter release from Vello prevents camera shake during the critical 1/100th second exposures needed for low-light dawn shots. The key is to arrive by 5:30 AM in July, when the first light hits the Grand Teton's east face at 6:12 AM, creating a golden rim light on antelope horns for exactly 17 minutes. Staying below the ridgeline and crawling the final 30 meters on hands and knees prevents silhouetting against the sky, a common mistake that spooks herds feeding on wild blueberry patches 40 meters away.
In the Everglades National Park's Shark Valley, the 15-mile tram road offers prime alligator photography from elevated boardwalks, but the best technique involves kneeling at the water's edge near the 3-mile marker at low tide. Using a Nikon Z8 with a 500mm f/5.6 PF lens and a monopod from Manfrotto allows for rapid adjustments when a great blue heron strikes at fish in the shallows just 12 meters away. The polarization filter on a B+W circular polarizer cuts glare from the tea-colored water, revealing the submerged roots where roseate spoonbills feed, while a shutter speed of 1/1600th freezes the splash of a striking osprey. Positioning the camera at ground level on a Gitzo Explorer tripod with the center column reversed creates a frog's-eye perspective that captures the reflection of cypress knees in the still water, a technique used by National Geographic photographers during the winter dry season from December to April for optimal visibility and reduced mosquito pressure.