Table of Contents
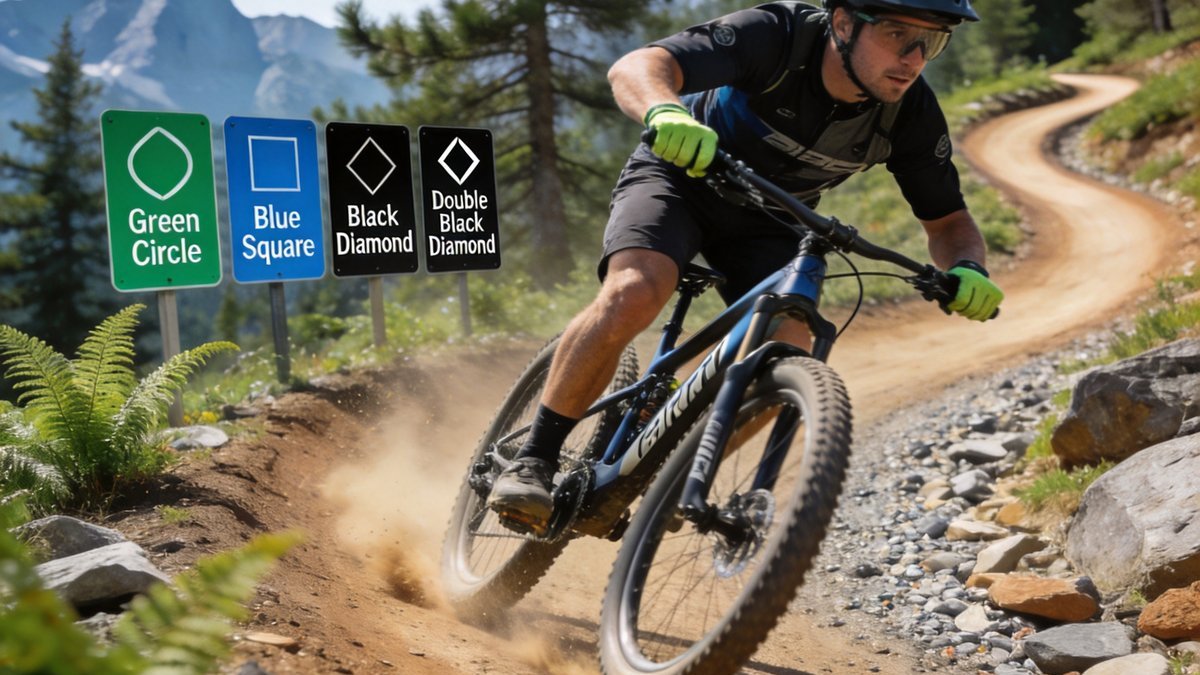
Understand mountain bike trail difficulty ratings from green circle to double black diamond. Learn what to expect at each level and how to progress safely.
Jordan Myers
Understand mountain bike trail difficulty ratings from green circle to double black diamond. Learn what to expect at each level and how to progress safely.
Understand mountain bike trail difficulty ratings from green circle to double black diamond. Learn what to expect at each level and how to progress safely.
Mountain bike trail difficulty ratings follow a standardized system adapted from ski slopes. Green circles mark easiest trails, blue squares indicate intermediate terrain, black diamonds designate advanced trails, and double black diamonds represent expert-only challenges. This system helps riders choose trails appropriate for their skill level and avoid situations beyond their ability.
The International Mountain Bicycling Association (IMBA) maintains the official trail difficulty rating system used by most trail networks in North America. Ratings consider trail width, surface, grade, obstacles, and the technical skill required to navigate the terrain safely. Understanding these ratings is essential for progressing safely and having an enjoyable ride.
Trail ratings are not a measure of fitness. A double black diamond trail is technically difficult regardless of how strong a rider you are. Respect the rating system, and you will live to ride another day.
Green circle trails are designed for riders with basic bike handling skills. These trails feature smooth surfaces, gentle grades, and minimal obstacles. Trail width is generous, typically 3-6 feet, with clear sight lines that allow riders to see ahead and anticipate terrain changes. Green trails are ideal for learning fundamental skills like braking, shifting, and cornering.
Most green trails avoid features like drop-offs, rock gardens, and tight switchbacks. When obstacles exist, they are small and have easy roll-around options. Beginner trails are also common on climb routes, allowing less experienced riders to access higher terrain without riding beyond their ability level.
Before progressing to blue trails, riders should be comfortable with basic bike handling including controlled braking, standing while pedaling, and looking ahead rather than at the front wheel. Riders should also learn to shift weight appropriately for gentle climbs and descents.
Blue square trails introduce more technical elements including moderate rock gardens, root sections, and tighter turns. Trail width narrows to 2-4 feet in sections, and sustained climbs become more common. Intermediate trails represent the largest category in most trail networks, offering the broadest range of experiences.
On blue trails, riders encounter features like tabletop jumps, bermed corners, and short technical climbs that require momentum management. Roller coaster-style terrain with short ups and downs tests a rider's ability to maintain flow while adjusting body position frequently. Most riders spend the majority of their mountain biking career on blue trails.
Intermediate trails are where mountain biking gets interesting. You will find flow, challenge, and the occasional feature that pushes your limits. This is where most riders improve the fastest because the terrain rewards skill development without punishing mistakes too harshly.
You are ready for intermediate terrain when green trails no longer challenge you, you can maintain momentum through gentle climbs, and you feel comfortable with basic cornering and braking techniques. Start with easy blue trails that have good sight lines and gradually work toward more technical terrain.
Black diamond trails demand confident bike handling, good fitness, and the ability to navigate sustained technical sections. These trails feature larger rocks, steeper grades, and mandatory technical moves with no easy bypass options. Trail width can narrow to 18-24 inches with exposure to adjacent slopes.
Advanced trails typically include features like drop-offs of 2-4 feet, rock gardens requiring precise line choice, and steep chutes that demand committed body positioning. Cornering on black trails often requires advanced techniques like counter-leaning and rear-wheel steering. Riders should have excellent bike-body separation skills.
Black diamond trails commonly include rock rolls, steep switchbacks, and log rides. Many advanced trails have received professional trail building with well-constructed features, but some natural terrain trails at this level are raw and unpredictable. Riders should walk unfamiliar sections before riding them blind.
Double black diamond trails represent the most technically demanding terrain available. These trails feature extreme grades, large mandatory drops (4+ feet), tight technical moves with serious consequences for failure, and sustained exposure. Double black trails are not recommended for riders who cannot confidently handle black diamond terrain.
Expert trails often require significant walking to inspect lines before riding. Features may include rock faces, gap jumps, and steep natural chutes with loose surfaces. Riders should be prepared for hike-a-bike sections and should carry appropriate safety gear including full-face helmets on the most extreme trails.
Progress gradually and respect the rating system. Ride each difficulty level until it feels comfortable before attempting the next. Ride with more experienced riders who can offer line choice advice. Always inspect unfamiliar features before committing, and never feel pressured to ride something beyond your comfort level.
A good guideline is to ride a trail three times at your current comfort level: once to survive, once to refine, and once to flow. If you can ride a trail smoothly without dabbing (putting a foot down), you are ready to try the next difficulty level.
Developing a consistent navigation routine keeps you oriented throughout the day. Every time you stop for a water break or snack, pull out your map and identify your current location. Note the next landmark you expect to see and the approximate time to reach it. This habit of regular map checks prevents the gradual disorientation that leads to getting lost. Experienced hikers recommend taking a bearing every 30 to 45 minutes in unfamiliar terrain, even when the trail seems obvious.
Before any hike, study the route on a map and identify key waypoints, bailout points, and potential hazards. Note the direction of ridges, valleys, and water features so you can use them as natural handrails. Share your planned route with someone who will notice if you do not return on time. Proper pre-trip planning transforms a potentially stressful navigation challenge into an enjoyable day on the trail.
When hiking in a group, designate a dedicated navigator rather than assuming everyone knows the route. This prevents the common scenario where each person thinks someone else is leading. At every junction, confirm the correct direction as a group before proceeding. A quick group check takes thirty seconds but can save hours of backtracking if the wrong turn is taken.
Developing a consistent navigation routine keeps you oriented throughout the day. Every time you stop for a water break or snack, pull out your map and identify your current location. Note the next landmark you expect to see and the approximate time to reach it. This habit of regular map checks prevents the gradual disorientation that leads to getting lost. Experienced hikers recommend taking a bearing every 30 to 45 minutes in unfamiliar terrain, even when the trail seems obvious.
Before any hike, study the route on a map and identify key waypoints, bailout points, and potential hazards. Note the direction of ridges, valleys, and water features so you can use them as natural handrails. Share your planned route with someone who will notice if you do not return on time. Proper pre-trip planning transforms a potentially stressful navigation challenge into an enjoyable day on the trail.
When hiking in a group, designate a dedicated navigator rather than assuming everyone knows the route. This prevents the common scenario where each person thinks someone else is leading. At every junction, confirm the correct direction as a group before proceeding. A quick group check takes thirty seconds but can save hours of backtracking if the wrong turn is taken.
Developing a consistent navigation routine keeps you oriented throughout the day. Every time you stop for a water break or snack, pull out your map and identify your current location. Note the next landmark you expect to see and the approximate time to reach it. This habit of regular map checks prevents the gradual disorientation that leads to getting lost. Experienced hikers recommend taking a bearing every 30 to 45 minutes in unfamiliar terrain, even when the trail seems obvious.
Before any hike, study the route on a map and identify key waypoints, bailout points, and potential hazards. Note the direction of ridges, valleys, and water features so you can use them as natural handrails. Share your planned route with someone who will notice if you do not return on time. Proper pre-trip planning transforms a potentially stressful navigation challenge into an enjoyable day on the trail.
When hiking in a group, designate a dedicated navigator rather than assuming everyone knows the route. This prevents the common scenario where each person thinks someone else is leading. At every junction, confirm the correct direction as a group before proceeding. A quick group check takes thirty seconds but can save hours of backtracking if the wrong turn is taken.
Developing a consistent navigation routine keeps you oriented throughout the day. Every time you stop for a water break or snack, pull out your map and identify your current location. Note the next landmark you expect to see and the approximate time to reach it. This habit of regular map checks prevents the gradual disorientation that leads to getting lost. Experienced hikers recommend taking a bearing every 30 to 45 minutes in unfamiliar terrain, even when the trail seems obvious.